looking for something?

if you've known me for more than a minute you may have heard my expression for what it feels like when i get an idea that just makes sense: 'it's like a white hot hammer of inspiration to the back of the head'

Wednesday, December 3, 2014

minutiae

there are a lot of little things i've done around my house to make daily life easier that aren't each enough for a full post. i keep meaning to take pictures and finally got around to it.
not the best pictures, just the camera phone.


i just had to replace my car battery. since i did it myself i didn't have a receipt for the date of service, like i would for a professional repair. masking tape label! i labelled it just like i do when i open a food package or put something in the freezer. 


extra shower rod. spring tension rods run around $8-$15 depending on the length. tighten it in place high up over the center of the shower, great for hang drying bras and other things that shouldn't go in the dryer. and my cpap hose. that little plastic octopus looking thing is a tie/belt hanger, something like this. i use it for bras. you can also just hang your drip dry delicates on plastic hangers and put them up here too. the blue clip is an oversized clothespin from the dollar tree, usually found in a multi pack
you could also use clothespin hangers and hanging drying racks (also in plastic but the two plastic ones i have had go brittle in about 2 years and fall apart) 


little magnetic bars from ikea. i think they are meant for desks and dorm rooms. i have one in each bathroom for tweezers and stuff. i also dropped a super strong magnet in the dental floss box so it sticks to the magnet bar


a holder on the side of my fridge for cleaners and paper towels.  i also made a smaller one with smaller magnets for a friend's dish towel holder. hers uses 25lb pull magnets which will NOT hold a roll of paper towels an 2-3 full spray bottles of cleaner to the side of a fridge. 
this will probably stick to most stoves too

two big round 95lb pull magnets from harbor freight tools
2 screw eyes that fit through the holes in the magnets, 4 nuts for the screw eyes


put a nut on the screw eye, put the screw eye through the hole in the magnet, put the other nut on the end of the screw eye. tighten them down until the screw eye is stable in the magnet without the end sticking out past the back of the magnet

this is an old curtain rod that the previous homeowners left when they moved out. but any pole or rod that can bear the weight and fit through the holes will work. this worked better before i knocked the finial off the other end of the rod so it slips out if i run into it


additional sizes of the magnets


broom clips and cheap LED flashlights. i keep them near every door to the outside for those nights the cats drop things on the doorstep that i have to deal with. i got a ten pack of flashlights with crummy batteries for $10 at harbor freight. i've also seen them at big lots and the dollar tree. here's a 2 pack for $3 (watch for sales)


 my tape rack. i've overloaded this one and the wall it's on is very old drywall, so i need to fix up the hooks. and make it longer. this is behind the door in the utility room. also would be good in a supply closet or garage. the bread tabs on the tape rolls make sure i can always find the end


this handy little twist tie dispenser is from the dollar tree. a 2 pack. cut your own length. it's probably meant to be nailed to the wall, but i haven't yet. you can also get them in garden centers. this one isn't a terrible price, but i'd check your local discount or dollar store first 


did everyone have that metal grid and plastic corner cube stuff in their dorm room? the plastic gives out but the metal grid panels have other uses. like my bread holder? cut a couple places and bend, then hook it under the cabinet. fits a standard size loaf snugly and keeps the cats from stealing bread


this is a limited use arrangement. if you live in the woods and lose power a lot, you might want to keep a lantern handy. most people don't have a) this weird banister wall arrangement and b) a need for a propane lantern hanging around the house. 
there's a really big cable tie (actually two, end to end) around the rail, and a plain metal shower curtain hook hanging off it. the lantern comes with the chain


speaking of the plain metal shower curtain hooks, everyone should keep a 12 pack around because you will find the most unexpected uses for them. i keep trying to learn glass lampwork and while i haven't yet managed to, i have the glass rods in a case. with a teeny tiny hole on the top. it won't fit over a peghook, but it will fit a shower curtain hook


and maybe you have an extra weird pantry, like i do, with a closet rod in it. i use the shower curtain hooks and various bag clips to hang up my chips so they don't get smashed. another limited use idea for this specific purpose, but then again, you can always add a tension rod to your pantry, right?


when your kitchen scissors wear out and won't go back together again (you did know they come apart on purpose, right?) save the halves and you have great box cutters with handles


Tuesday, September 16, 2014

perfect pickles

i think i've cracked the perfect fried pickle! there have been a lot of delicious and not so delicious experiments but i finally made a consistent and delicious batch of light, savory fried pickles with the right amount of crispy batter.

tempura beer battered pickles:
do not make ahead, they just don't keep!

ingredients:
1. hamburger dill chips. i prefer mt olive brand, but that's just what's easily available locally and sams club sells a giant freaking jar for under $4. i love pickles
2. tempura batter mix. i've been using Hime brand which is readily available in my local asian markets and grocery stores. 
http://www.asianfoodgrocer.com/product/hime-tempura-batter-mix-10-oz
3. inexpensive boring light/light colored beer. i've tried michelob light and rolling rock. so far i prefer the rolling rock. it needs to be ice cold. don't take it out of the fridge until you are mixing the batter. unless you are making an insane amount of pickles, you will have beer left. half a beer makes pickles for two people.
4. vegetable oil
5. vegetable shortening - plain, not the fancy butter flavored stuff

tools:

1. paper towels. both for squeezing the excess pickle juice out of your pickle chips and for draining the fried golden goodness after cooking
2. a cooking vessel deep enough for several inches of hot oil
3. metal tongs long enough to keep your fingers away from the oil
4. 1 or 2 shallow dishes/bowls for the batter and optional extra tempura mix (dry)
5. something to mix the tempura batter with. i like to use a fork. the one on the left. the one on the right is just not good for the job. the fork on the left also is my crab cracking fork, not that it's relevant. but it's no unitasker!

6. your choice of frying basket, frying skimmer or wide slotted spoon. 
7. a plate for draining your pickles
8. if you have it, a fryer/candy thermometer. needs to measure up to 350. without it, you're going to need some test batter and a good eye. (when buying a thermometer that needs to measure the temperature over time, spring for the one with a clip on it to clip to the edge of the pan. it's sooooooooooo worth the extra buck or two)

steps: 
1. get out your pickles, press them firmly between a few layers of clean absorbent material of your choice. i'm a paper towel girl myself
2. put your oil and shortening in the pot, about 50/50. you can make it deeper but it needs to be at least 3 inches deep. your pickles need to be able to turn over.
3. turn on the heat, somewhere between medium and high on your stove. i don't know how hot your stove is. mine goes from "LO" to "1-8" to "HI" and "7" is the right temperature. turning it too high to get it hot enough is just going to waste time waiting for it to cool down a little. start heating the oil evenly and plan to spend a few minutes doing other steps while it gets hot.
4. make your line in some order either from left to right or right to left, whichever direction your kitchen flows:


  • spot for the beer when you take it out of the fridge. it doesn't go in the middle because you WILL knock it over as you pass the pickles down the line
  • drained pickles
  • container of tempura mix to be used in small amounts as needed - it's best if this is something you can shake small amounts from as you go. i like to take the plastic bag of mix out of the box and just snip off a corner
  • shallow batter dish
  • (optional) shallow dish of dry tempura mix
  • place to rest your tongs and/or skimmer
  • pan of hot oil
  • draining station -use something heat resistant that you can layer paper towels or other clean absorbent material on that's wide enough that you won't be making a greasy pickle mountain or your bottom layers will be soggy and nasty. a few layers of pickles is ok, but don't stack them too high
  • something to wipe your hands on
you may want to lay out the messy stuff on a tray, newspaper, flattened paper grocery sacks or a line of big cutting boards. tempura batter dries on counters like wallpaper paste. 

5. check the oil. you want 350 degrees. (without a thermometer start looking for the oil to swirl in the pan and test it with a drop of batter after you've mixed the batter. you want the batter to be light golden /honey colored in about 2 minutes, and fully puffed up, not doughy)

6. you only want to mix as much batter as you are going to use each few minutes. get your cold beer out, open it and put a little in your bowl. yep, it's going to foam.  not more than about 1/4 of a cup at a time. add some tempura mix and stir with your fork, adding and stirring until you get to the consistency of pancake batter. thicker than crepe batter, thinner than waffle. when you drag the fork through it you should leave marks that close up after a second. if you aren't sure, mix, do a test pickle, cook it and see if it's to your liking. thicken or thin as needed

OPTIONAL STEP: put some dry tempura mix in the optional second shallow dish

7. if you are using a fryer basket, this is the time to put it in the oil. optional step

8. with your tongs, pick up a pickle and drag it through the batter, getting both sides. you can alternately drop a clump of them in and stir thoroughly but you risk clumps of partially unbattered pickles. 

OPTIONAL STEP: a dredge. lay the pickle in the dry mix, and turn it to coat both sides with extra mix. with this step you get an extra crunchy irregular surface texture. without this step you get a smooth, puffy tempura dough exterior. i like them rough and crunchy

9. drop a pickle into the oil, in the basket if you are using one. do not drop a clump of them, as this risks a hot oil cannonball splash AND lowers the oil temperature, messing with your cooking. with practice you will get a rhythm where you can drop, batter, drop, batter and they will all still be done about at the same time 

10. light golden honey colored - no white thick uncooked batter is the goal. you may need to turn them with your tongs

11. remove and drain, either with tongs, skimmer or just lift the fryer basket if you are using one, tap against the pan to shake some oil off and dump it onto your draining area. 

eventually you may find you have made tempura fried tongs - this is why i like to mix the batter with a fork even when i own tiny cute whisks - the fork is perfect to break the fried dough off the tongs.

you will need to mix more batter as you go and if your kitchen is warm you may want to keep putting the beer back in the fridge in between or set the bottle/can in a bowl of ice, cold is key to a light tempura batter. nope, i don't know why but i've messed it up enough to know it's true. some people even keep the tempura batter bowl on ice but my house is always cold so i haven't done it that way yet. 


additional stuff
this is also excellent with shrimp, catfish and broccoli. fried pickles and catfish is fantastic

you can put some hot sauce or cayenne pepper in your batter if you want a little kick. i don't normally put texas pete on my food but it would be my hot sauce of choice for this batter. 


in the south, this is commonly served with ranch dressing/dip. this is delicious but optional. you can eat them plain, dip them in a cheese sauce, stack them right on a burger like some places put fries on a burger. hell you can get pregnant and eat them with ice cream. it's up to you.

you absolutely can strain, cool and store your oil. don't strain it while it's hot, but still warm is easier than cold because it will turn sludgy due to the shortening. i use a metal strainer but if you want a finer strain, use a coffee filter. if you used this for fish or shrimp too, i wouldn't want to use it for anything other than fish or shrimp in the future. the flavor will stay with it. 

if you want to be extra super duper silly, you can save a large NON PLASTIC LINED* #10 can with a lid, unpainted, no paper or plastic labels. fry right in the can, let it cool and put the lid on. i haven't done this but it's in a helpful hints from heloise book i own. if you have a camping pot handle, bonus points 

*this means no tomato sauce cans or anything else that was highly acidic as those cans have a plastic lining and cooking with plastic on the stove is a thing we all learned not to do in kindergarten, right?


things i tried previously that failed. failed big time

cornmeal batter. it always seems to come out like a coating of flaky rock
just vegetable oil - greeeeeeasy
just shortening - hard to control the temperature
thicker batter - doesn't stick
dipping pickles in buttermilk and then the dry mix. this isn't fried chicken, it just made globs of dough and fell off in the fryer
mixing the tempura batter with pickle juice or water 
not drying the pickles - batter doesn't stick
using hand cut vlasic kosher dills - i found them delicious but the slight sogginess to the hamburger dill chips actually improves the finished product. 

extra weird thing i tried that wasn't terrible - mix tempura batter up with pickle juice as your liquid, DON'T dip anything in it and just drizzle it in the oil like funnel cake. yeah, it's like pickle dough funnel cake. it's ... i might do it again sometime if i'm drinking. it's really good drunk food

Saturday, June 7, 2014

the right pen

been trying to do this for a while, with a cheap pen. specifically an inexpensive pen, not a fancy steel bodied one. because i lose things.
sometimes you just need to write things down.
near the fridge, or the metal front door.
but the smallest magnetic spheres i could find don't fit in your average bic and i don't want to glue a magnet to something that isn't always going to be around, whether i lose it or it just runs dry.
someone left this pen behind and it looked just the right size for my smallest spheres (a.k.a. bucky balls)


the magnetic spheres aren't strong enough to stick to the fridge through the plastic of the pen on their own, but a superstrong magnetic disk on the fridge works perfectly. similar to the setup for the little spray bottle of water for cleaning my wet-erase marker grocery list
after using the pen earlier, this idea hit me so hard i had to get up from watching the 2nd to last episode of Defiance season one.
so now back to that and pricing an extra shelf for my fridge. because hey, i have the space and use for it and GE sells the parts

Monday, April 21, 2014

travel tissue

this is a personalized take on another camping hack that i have seen floating all around pinterest/buzzfeed/etc
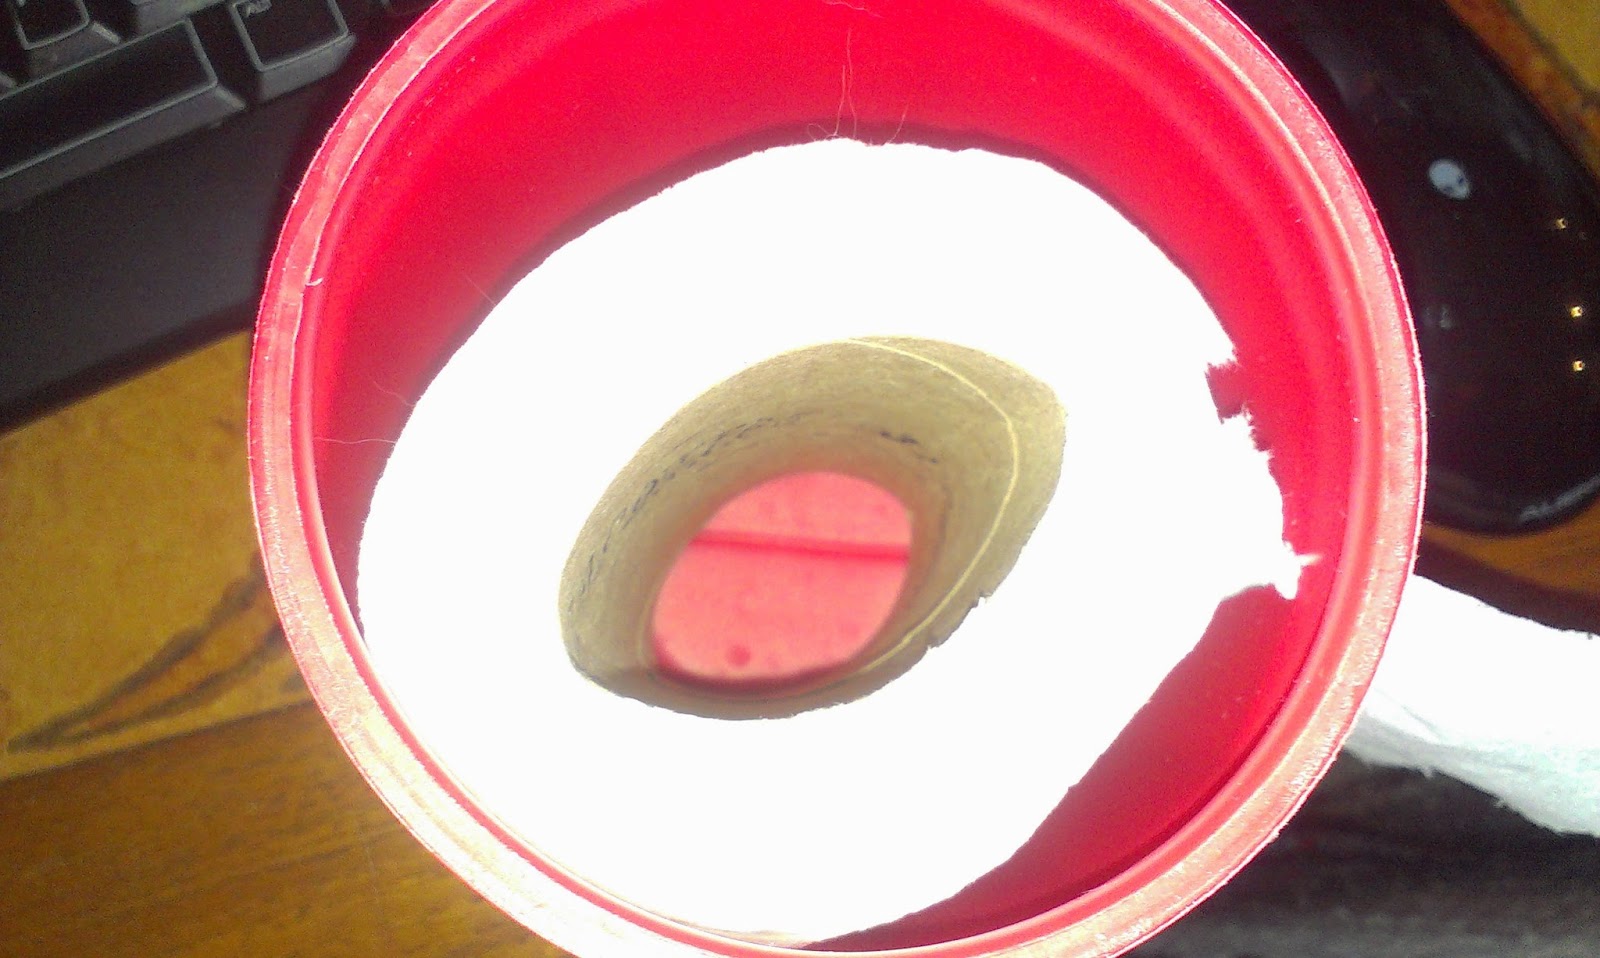
i couldn't make the original because i apparently don't buy the correct quantity of ground coffee in a plastic tub. this is the container from the 11.3 oz size of ground folgers. 
i have sometimes in the past, but that canister is currently in use as my "washing kit" for travel and camping. 
so i was working with the small size, which does not hold an entire roll of toilet paper. 
good thing it's not too hard to swap out the roll at 3/4 full.

sorry, i didn't have a photographer, but this one is easy to do without a lot of step by step.

wash coffee canister. make a cut down the side at least a 1/4 of an inch wide and as tall as a roll of toilet paper. i started it with a pocket knife and used titanium shears to cut it, but i suspect that was overkill. tough scissors should do it. i was using what was already on the coffee table. 
insert roll. 
for the large sized canister you can use a full roll, or if you don't buy the giant mega super charmin family size garganutan rolls that i do, normal ones probably fit in the 11.3oz sized canister. 

this is the first draft. it was not quite right. if you look closely at the top of the cut in the plastic, the tissue is squeezed. this did not pull out smoothly and ripped. 

you can see the rip from the inside 

riiiiipped! if you look carefully past the flash, you can see the top of the tissue catching on the plastic and making a little tissue wad


cut a little taller and a little wider. 


yay! there's the correct fit! the tissue pulls out smoothly and cleanly, no tears. and the container is small enough to fit under some car seats or in shoe pockets on the back of the driver's seat, unlike the full sized coffee canister. 
so the original hack is to take this camping, and you can tie a string through the canister for hanging on a tree or campground bathroom door.  (you ever go to a campground in the off season? be glad they unlocked the restrooms and turned on the water, but don't count on TP!)

personally, i will be taking it to the beach this weekend. not camping but good for the road trip and for dealing with excess sunscreen spatters. 
this seems like an excellent way to have tissues at the ready in the car for those of you with kids. cheaper than fancy kleenex boxes and better protected from sticky small ones. 

recipe holder

this feels so simple to me that i cannot even think of it as a real hack
i was watching a video about uses for resealable zip top baggies and this was suggested:


place your recipe in a clear plastic bag on the counter so it doesn't get food spatter on it while you cook.
look, that's snazzy and all, but on the counter? why? my ingredients and mixing bowls are on the counter. there's no extra room on the counter. 


enter: our friend the binder clip


you know the metal wings come off, right?


why  hello, cabinet door pull!


squeeze and snap that sucker back on there, then flip it back up:


voila! eye level recipe protected from spatters.
and that's my great grandmother's spoonbread recipe. deeelicious! 

of course for a larger recipe, like a magazine page cut out or such, use a larger bag. you could probably even use this for a small cookbook, although i might throw a pencil or a wooden spoon handle in the top of the clip to rest along the top of the book and make sure it stays spread open to your page. 

Wednesday, February 26, 2014

Trashy Terrariums

it's time to start planting and to that end, i've been saving some trash and recycleables.
might as well start with reuse and move into recycle later

first, i saved a couple of cardboard trays from soda cans. it's a good place to start seedlings - easy to move, no mess on the counter, and sturdy enough to hold several pots or terrariums

and here you see the bottom of a gingerale bottle. clear bottles might work better, but this is what was available.


i cut the bottles in half, then on the bottom half i made 4 or 5 slits about an inch long down from the cut edge, evenly spaced


lettuce seeds from the asian market. no idea what kind they are. the only instruction in english is to soak the seeds in water in the fridge for 2 days. it's 62 degrees F in my house so i felt ok to skip this step. the terrarium doesn't have drain holes so the dirt will stay as moist as i tell it to while the seeds germinate


 when it's time to put the top on, just push the cut edges of the slits to overlap each other, reducing the circumference of the bottom half just a bit


push the top half of the bottle down over it as far as it will go

the overlapping edges don't matter a bit to the inner workings of the terrarium as the top should slide down well past them and you shouldn't have to cut as far down as where the soil and water come to

for the time being, i haven't put the bottle cap on, but make sure you save the cap as that is your humidity control


these fancy little containers are single serve pretzel & sabra hummus snack tubs. hat tip to my friend jon for this one - last year so many of his tomato seedlings succeeded in these that he had extra plants to give me. i've been saving the containers ever since
i'm experimenting with the seeds for the san marzanos. almost none of the tomatoes survived, between a late bloom, deer eating them, and an early freeze. i got one plant indoors while the tomatoes were green and most of the green ones went to my sister when the plant died. i found a few small tomatoes that ripened anyway, so i set them aside to dry. they may not be mature enough seeds, they may not make it for whatever reason. but i put one small tomato each in two hummus tubs with LOTS of water to soak and rehydrate. in the past i've gotten the best plants from putting whole, overripe tomatoes into dirt so i am guessing they might do better if they have the fruit to feed on as it rots into the soil.

make sure to write your variety on the top with a sharpie.
the cherokee purple seeds are a pinch of seeds leftover from a trip to monticello last year. i put half a dozen in each of 2 tubs and i figure if i get 3 seedlings out of the old seeds i'll be doing ok.

for the time being the seedling tray (cardboard box) is parked under my skylight. there's not a lot of sun this time of year but it's 35F outside tonight so i can't start seeds indoors.


update - the lettuce didn't grow. the tomatoes grew quite well, although most of the sprouts succumbed to a late and unexpected freeze. i recently found some sprouts that i didn't think would grow in one of the hummus containers in my carport, 3 months after i put a not quite ripe dehydrated tomato from last fall's frozen san marzano plant in there. fingers crossed!


first crop, these got frozen after i had transplanted and set them outside


freezer bag portion control

hat-tip to Lunchinabox.net - that blog appears to be fading away and may not be around to link to later, so here's my lazier version of her nifty trick

if you don't already know this one, here's the way i learned to freeze ground beef (sausage, any ground pork/chicken/turkey etc) in portions while only using one large plastic bag. never deal with trying to thaw and use several pounds of ground meat again.


1. place meat in bag. if you intend to season it, this is a great time to add the seasoning and squish it all around without getting your hands or a bowl dirty